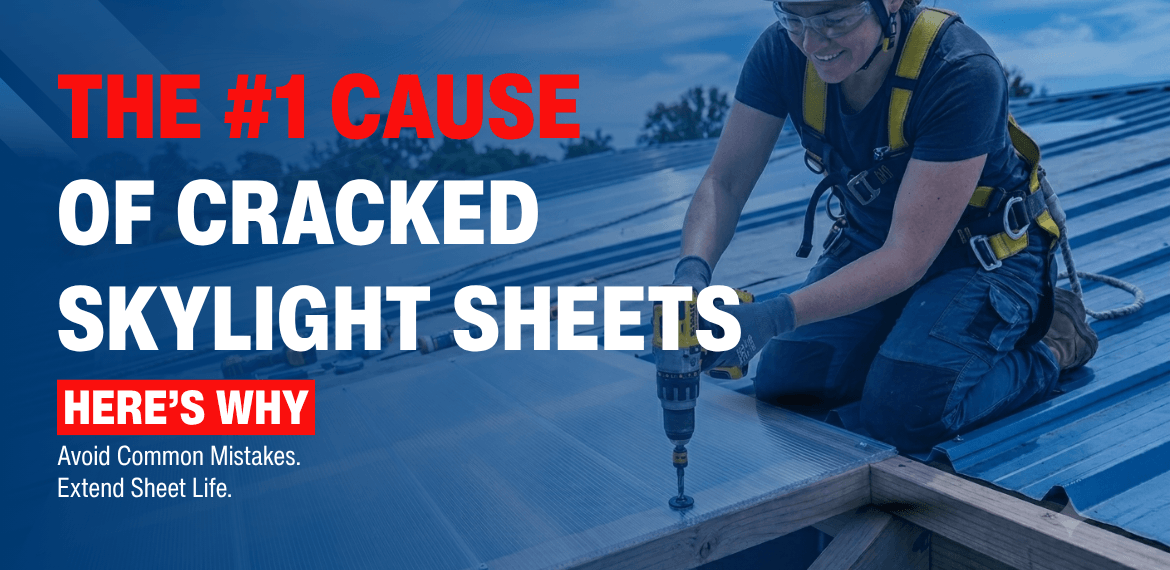
Introduction
Polycarbonate skylight sheet installation can deliver bright natural daylight with long term performance, but only when the sheets are fixed correctly. Cracks around screw holes, leaks after the first rain, and noisy, rattling roofs usually come from simple installation mistakes. This guide explains how to fix polycarbonate skylight sheets safely, using the right fasteners and methods that installers and DIY users can follow with confidence.
What Makes Polycarbonate Skylight Sheets Crack During Installation?
Polycarbonate skylight sheets usually crack due to wrong drilling technique, using incorrect fasteners, or ignoring thermal expansion. When fasteners grip the sheet too tightly or holes are too small, stress builds up around the fixing point. Over time, movement from heat and wind turns that stress into visible cracks and leaks.
Can You Screw Directly Into Polycarbonate Sheets?
You should never drive polycarbonate roofing screws directly through a sheet without pre drilling. Polycarbonate is tough but still sensitive to point loads from sharp threads. Always drill an oversized hole first, then insert the fastener with a sealing washer so the sheet can move freely around the fixing point without stress.
What Screws Are Best For Polycarbonate Skylight Sheet Installation?
For polycarbonate skylight sheet installation, use self drilling or self tapping polycarbonate roofing screws with corrosion resistant coating and bonded sealing washers. The ideal polycarbonate sheet fasteners have a drill point suited to the supporting metal or timber, a wide washer for load spread, and a neoprene or EPDM seal to prevent leaks and vibration.
Why Do Polycarbonate Sheets Crack Months After Installation?
Polycarbonate sheets often crack months later because thermal expansion was not considered. When sheets are fixed too rigidly or holes are the same size as the screws, daily temperature cycles cause micro movements. Without expansion clearance, those movements concentrate around the fixing points and edges, eventually leading to star cracks and water ingress.
How To Drill Polycarbonate Sheets Without Damage?
To master how to drill polycarbonate sheets safely, focus on low speed, sharp tools, and oversized holes. Use a standard metal drill bit, keep the sheet well supported from below, and let the drill do the work. Do not push too hard or use hammer mode, as this can chip the sheet and create invisible stress lines around the hole.
Step By Step Guide To Polycarbonate Skylight Sheet Installation
Below is a practical workflow that installers and DIY users can follow to avoid cracking, leaks, and premature failure.
Step 1: Plan Sheet Layout And Support Spacing
Plan the panel layout so end laps and side laps fall on strong purlins or rafters. Keep support spacing within the sheet manufacturer recommendations and avoid wide gaps that can make sheets sag. This early planning step ensures the skylight sheet fixing method matches the roof structure and load conditions.
Quick points
- Use continuous supports at sheet ends and laps for better sealing
- Keep spans shorter in windy or high load areas
Step 2: Choose The Right Fasteners And Washers
Select polycarbonate sheet fasteners designed for roofing applications and compatible with the structure material. Use polycarbonate roofing screws manufactured from corrosion resistant steel with appropriate coating, along with metal bonded washers that have UV stable rubber sealing pads. Matching screw length to sheet thickness and purlin depth prevents over penetration and movement.
Quick points
- Use corrosion resistant fasteners in coastal or industrial zones
- Avoid mismatched loose washers that can cause leaks
Step 3: Mark And Pre Drill Fixing Holes
Mark all fixing points before drilling and keep them away from sheet edges, usually at least one and a half times the screw diameter. When fixing polycarbonate sheets, always pre drill a hole larger than the screw diameter to allow for expansion. Clean swarf from both faces immediately so it does not melt or mark the surface.
Quick points
- Drill through a single sheet at a time for accuracy
- Keep drill perpendicular to the sheet for round, clean holes
Step 4: Allow For Thermal Expansion And Contraction
Thermal movement is a critical part of polycarbonate skylight sheet installation. Polycarbonate expands more than metal roofing, so each fixing must allow the sheet to slide slightly as temperatures change. Oversized holes, correctly compressed washers, and proper end clearances at flashings or walls prevent buckling, noise, and cracking over time.
Quick points
- Leave expansion gaps at sheet ends and around penetrations
- Never clamp sheets rigidly under metal bars or continuous plates
Step 5: Fix Screws With Correct Tightening
Drive polycarbonate roofing screws with a clutch controlled drill, stopping as soon as the washer seats and gently compresses. Over tightening forces the washer to mushroom and grips the sheet too firmly, increasing the risk of stress fractures. Under tightening, on the other hand, can cause leaks and rattling during wind or rain.
Quick points
- Stop as soon as the rubber washer lightly flattens
- Check a few fixings by hand to confirm consistent tension
Step 6: Seal Laps And Penetrations Properly
Use compatible sealants and tapes recommended for polycarbonate and the supporting roof system. A good skylight sheet fixing method combines correct overlaps with flexible seals that accommodate movement. Avoid generic silicone that may not adhere properly or could react with the sheet coatings over time.
Quick points
- Apply sealant in continuous beads, not dotted patches
- Keep seal lines away from direct ponding areas where possible
Step 7: Check Finished Roof For Drainage And Movement
After installation, visually check that sheets sit correctly on the supports, laps are aligned, and water will drain freely. Lightly press near fixing lines to confirm the sheet can flex slightly without noise or cracking. These final roofing sheet installation tips help detect early mistakes before rain exposes them.
Quick points
- Confirm gutters and flashing direct water away from laps
- Inspect underside for any missed fixings or loose fasteners
How To Prevent Polycarbonate Cracking Around Fixings?
To prevent polycarbonate cracking, combine oversized drilled holes with the right polycarbonate sheet fasteners and controlled tightening. Avoid fixing too close to edges, never use impact drivers on high torque settings, and always allow for movement at junctions. Regular inspection in the first season helps catch early stress signs before they grow into full cracks.
What Is Different About Multiwall Polycarbonate Installation?
Multiwall polycarbonate installation needs special attention to the internal flutes and sheet orientation. Sheets must be installed with flutes running in the direction of water flow, and edges sealed or taped as per manufacturer guidance. Extra care is needed when fixing polycarbonate sheets in multiwall form because compression at support points can affect insulation and condensation performance.
Do’s And Don’ts For Fixing Polycarbonate Sheets:
Do’s
- Pre drill oversized holes for every fixing point
- Use purpose made polycarbonate roofing screws with sealing washers
- Follow recommended support spacing and end bearing lengths
- Allow for thermal expansion at all perimeters
Don’ts
- Drive screws directly without drilling
- Over tighten fasteners until washers distort heavily
- Ignore movement joints at ridges, gutters, or wall abutments
- Use incompatible sealants or hard gaskets that restrict movement
These simple roofing sheet installation tips dramatically reduce cracking and leak risks while extending service life.
Common Problems, Causes, And Solutions In Skylight Fixing
Problem – 1
Cracks radiating from screw holes within months
Cause
Holes too tight, fasteners over tightened, no allowance for movement
Solution
Drill larger holes, replace damaged fasteners with proper polycarbonate sheet fasteners, and refix using controlled torque
Problem – 2
Water leaks at overlaps or around washers
Cause
Incorrect skylight sheet fixing method, poor washer compression, or wrong sealant
Solution
Refix with new washers, ensure uniform compression, and use compatible flashing and sealant system
Problem – 3
Sheets rattling or booming in wind
Cause
Fixing points too few or uneven, fasteners under tightened, or spans too large
Solution
Add extra fixings following manufacturer layout and check tightening on all screws
These approaches help prevent polycarbonate cracking and repetitive callbacks, protecting both the roof and the installer’s reputation.
Tool And Fastener Checklist For Installers
Before starting polycarbonate skylight sheet installation, prepare a clear checklist. Include measuring tools, marker pens, low speed drilling machine, suitable drill bits, cutting tools recommended by the sheet manufacturer, and appropriate safety gear. Add polycarbonate roofing screws with matching washers, compatible sealants, and correct flashings to complete a durable system.
Real World Installation Scenario
Imagine a metal roof where solid skylight sheets are mixed between opaque panels. During summer, the skylight area gets hotter and expands more than the metal. If the installer has used tight holes and generic self drilling screws, the sheet will slowly press against the fixings until hairline cracks appear. By instead using pre drilled oversized holes and specialized polycarbonate sheet fasteners, the sheet slides smoothly over the fixing zone, stays sealed, and remains intact for years. This is where correct skylight sheet fixing method directly translates into long life performance.
Frequently Asked Questions About Polycarbonate Skylight Sheet Installation
Are installation practices different for brands like SABIC Covestro and Palram Industries sheets
Core principles remain the same across brands from major manufacturers such as SABIC, Covestro, and Palram Industries, but each product line may have detailed instructions on edge sealing, flute taping, and minimum bend radius. Always pair these brand guidelines with high quality polycarbonate sheet fasteners and good roofing practice for the best result.
By following these methods and using the right fasteners and tools, installers and DIY users can achieve reliable polycarbonate skylight sheet installation that resists cracking, controls leaks, and maintains clarity and strength for many years.